Gift bags are one of those items that you NEED and use over and over again! Many times, I need them at the last minute and…. the occasion and theme always seems to differ. Here are my “how to decorate gift bag ideas“. About 15 years ago, I decided to always buy sturdy paper gift bags, in bulk, in a basic color and decorate as needed. This is one DIY decision I have never regretted! Those receiving the custom gift bags are thrilled, and as for me, they were a joy to assemble.

In order to make this a fun, easy experience, I recommend these simple steps:
- Purchase all items in advance and keep together, to use as needed. You will need paper bags, printer paper, printable sticker paper, glue dots, scissors or paper cutter, and do not forget ink for your printer (this seems to be the most overlooked and frustrating part).
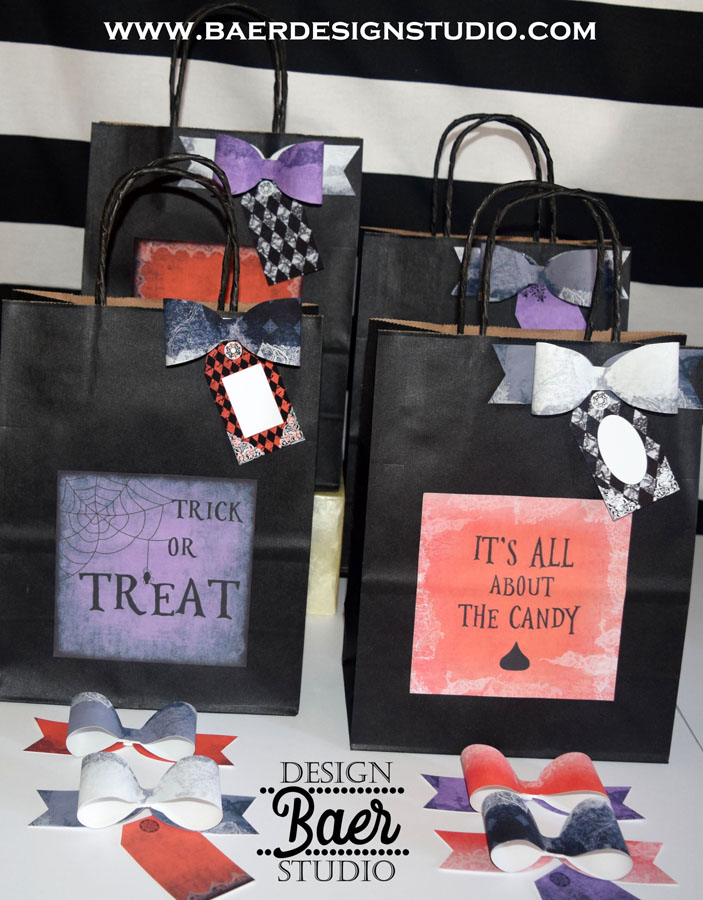
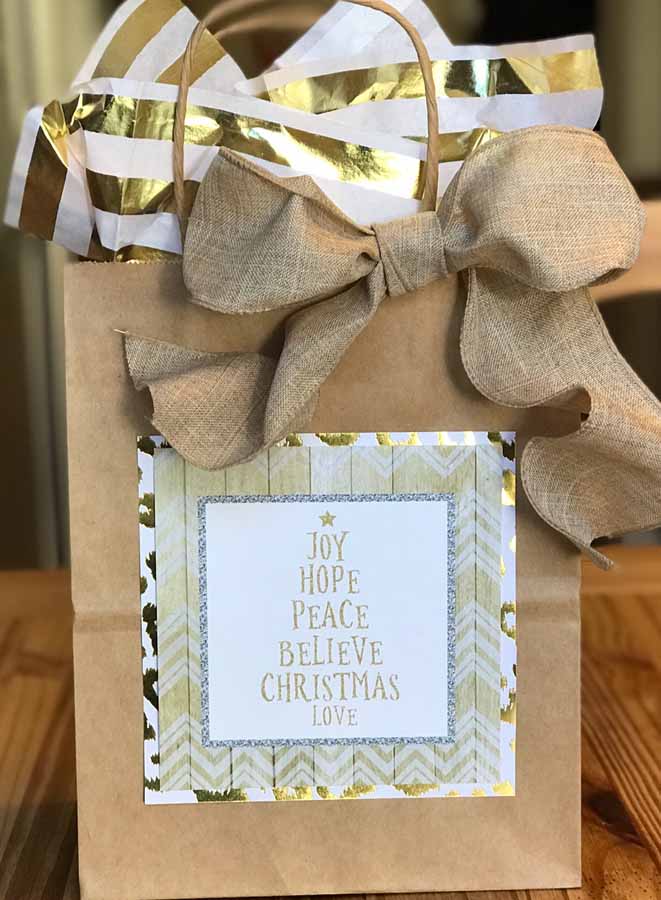
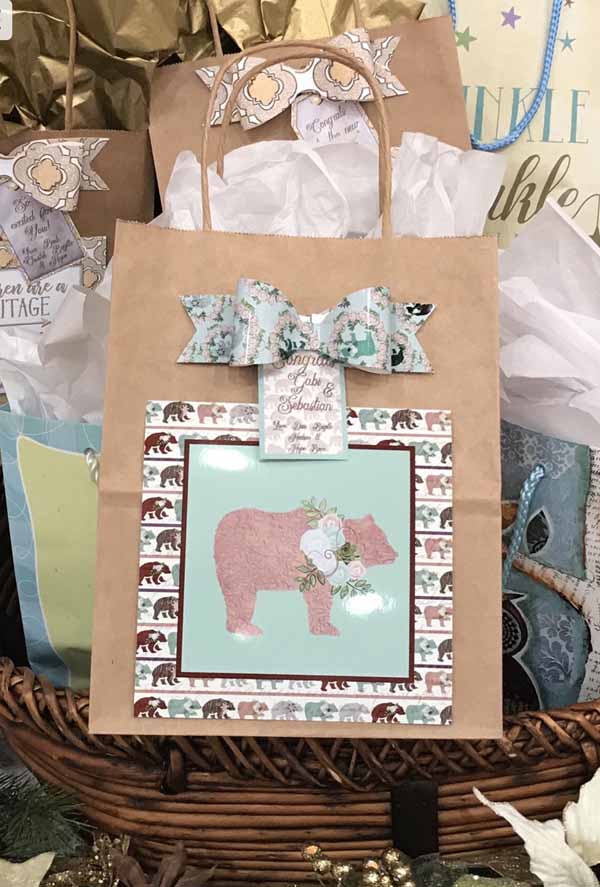
- Generally, I purchase basic colored bags made of thick paper, with handles and around 9 inches tall. This size seems to work well for holding favors, treats, gifts and even gift cards. I find that white, black, kraft and gold bags seem to be the best choice when buying them in bulk. Although I am a frequent shopper at the dollar store, I try to avoid using their paper gift bags. I have had the bags tear and the handles fall off at the worst times. However, I am a fan of their plastic treat bags.
- To decorate the body of the bag, I love to use instant download printables, quotes, and clip art. The beauty with a digital image or pre-designed printable, is that you can use it over and over again and it is always available. I designed a collection of printable quote cards that you can purchase here.
- I find that a 5 inch square label is the perfect size for a 9 inch bag. The fastest way, is to print out the image directly onto printable sticker paper for the body of the bag. HOWEVER, I use glossy or matte photo paper if I need a specific look or if I need the colors to be exact, bright and crisp. Printable sticker paper can change the color integrity of the digital image. Sometimes this matters, and at other times, the color change is not that important. If you are need tips on how to get the best printer results, I recommend reading my blog post about printing.
- My latest passion, has been the fun and easy printable bows (pictured below). I suggest you print onto a heavier weight matte printer paper. All you need to do is cut out the bow piece with scissors and glue the two outer tabs into the center using a sticker adhesive glue dot. Next, glue the bow onto the ribbon shape. Finally I attach it to the bag using a a glue dot.
- Printable gift tags are also a quick, easy and beautiful way to personalize a gift bag. I like to use the heavy matte photo paper when printing my tags. Sometimes I bring the tag printable pdf into a software program to add names. I tend to do that for parties. I also keep a tub with pre-cut gift tags on hand and then I just use add a name as needed. I like using Sharpies to add name because the ink does not run. I prefer to use a paper cutter when trimming my tags from their 8.5 x 11 sheet. Sometimes I punch a hole and add ribbon to the tag, but many times, I just add a glue dot to the back of the tag and tuck it near the paper bow.

To top off the the gift bags, I always keep assorted tissue paper on hand. Sometimes I use it to wrap around the gift or gift bag items, but most of the time, I just add it on top to add a festive touch!
I wish you much joy and creativity!
Brigitte Baer, Baer Design Studio