How to make laser cut wedding invitations with Cricut–
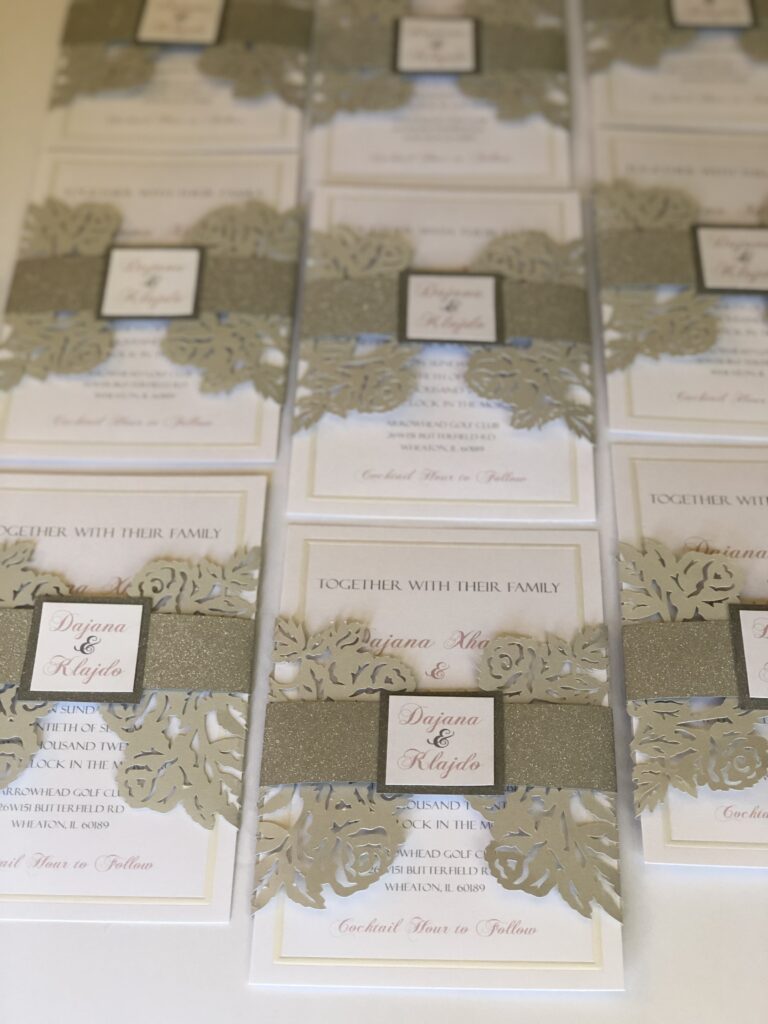
Featuring Filigree Gates, Glitter Wrap and Monogram Square -this 5.5″x8.5 inch invitation fits perfectly into an A9 envelope
Throwing a wedding during the COVID-19 pandemic comes with loads of restrictions! Keeping the guest list to 50 people is no easy feat! On the flip side, having a small wedding means only having to send out a handful of invitations, so those invitations can be extra special! Since most stationery companies will not sell laser wedding invites in tiny amounts, I was was forced to make them on my own.
Here is my supply list so you can see the products I used, but feel free to substitute with supplies you have on hand:
Cricut Design Space M47EE6 Sophisticated Invitation
Glitter Paper 2 different colors
I had never used my Cricut Explore to make those gorgeous filigree laser like cuts before and was very intimated! But since I was only making 10 invitations, I figured this was a great time to give it a try.
STEP ONE: Create your own invitation using fonts of your choice. If you do not want or know how to create the document, you can purchase the featured design HERE. I set up my document to be 5.5″x8.5″ because of the stationery kit I was using for my invitation.
STEP TWO: Print out your invitation. For the example, I used this stationery kit as it comes with the envelopes and prints beautifully on my inkjet printer. I like to keep this generic paper kit on hand because it is basic white with a subtle white shimmer border. It works well for any occasion.
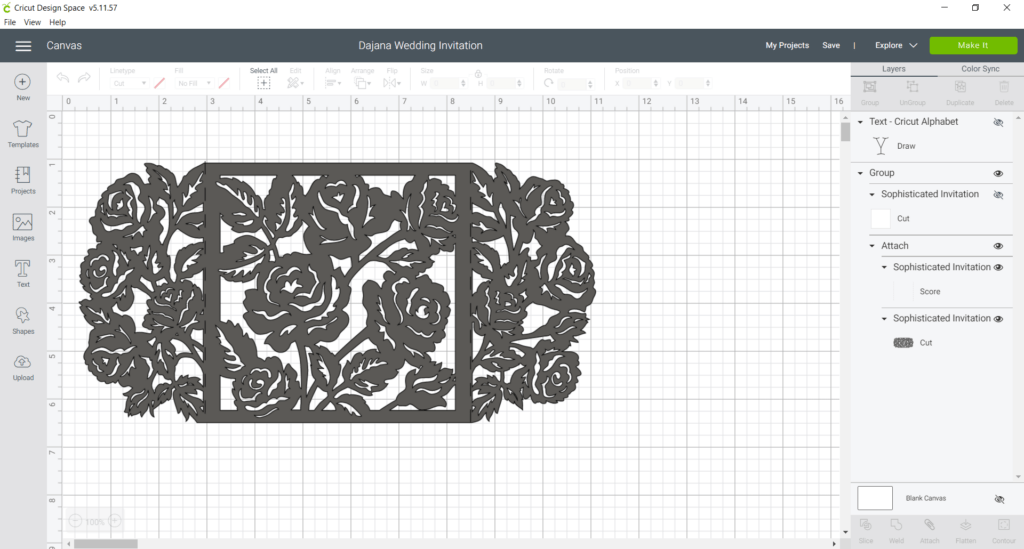
STEP THREE: I opened the Cricut Design Space program on my laptop and located the free template Cricut Design Space #M47EE6 Sophisticated Invitation. In order to locate this template, you have to search for it in the Design Space program. Although in Cricut’s project, they used it to make a square invite, I choose to use the template to make more of a gated sleeve for my invitation.

I choose to make the filigree wrap 10.789 inches wide by 5.47 inches high, so the filigree wrap was the exact size to cradle the 5.5″ x 8.5″ invitation.

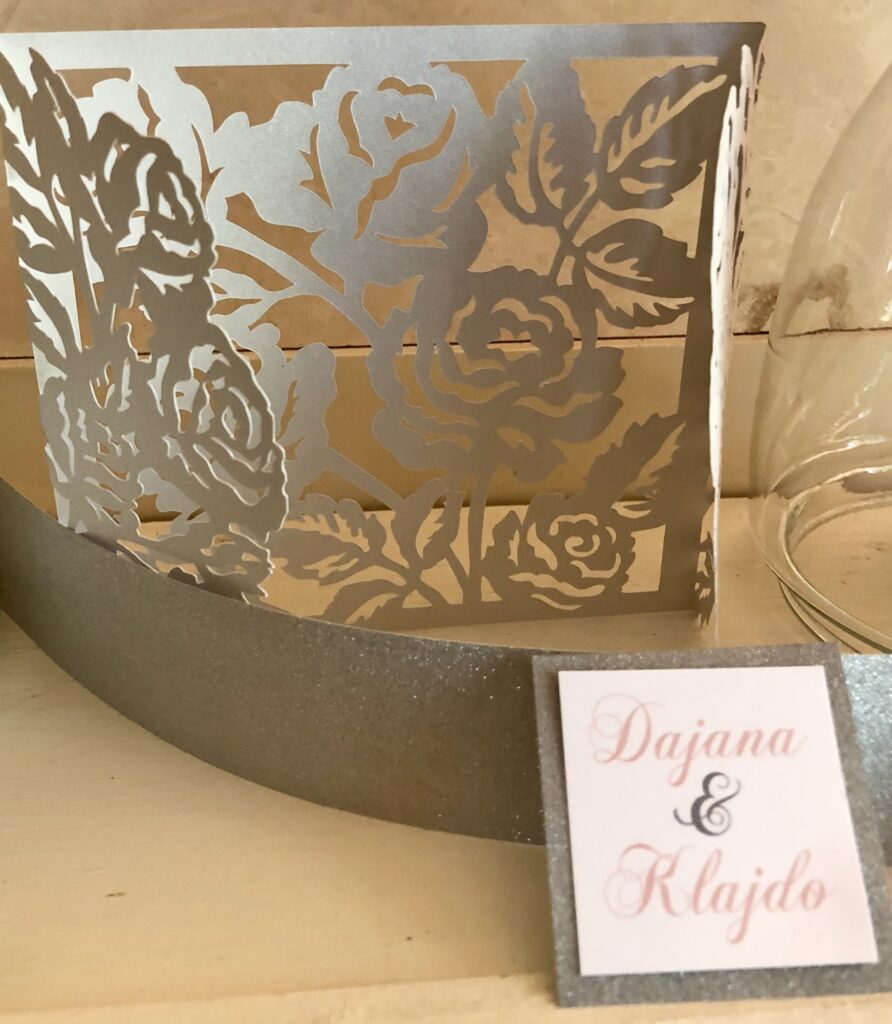
STEP FOUR: Lay the Shimmer paper in 65lbs onto the Light Grip mat. A 65lb coverstock seemed to be the perfect weight. It was not to stiff but it also did not tear during the cutting process. I set my cutter to the setting between fabric and poster board. THIS IS VERY IMPORTANT! If you do not choose the correct setting for your paper weight, then it will be difficult to get a clean cut. When you have completed your cut, your should be able to bend your mat and the laser cut invite should cleanly peel from the mat leaving the filigree pieces behind on the mat.
This step requires a bit of patience. It took my Explore Air 25 minutes to cut the Gated Filigree Wrap! Yup! Gulp! Also, when you remove the mat, bend the actual mat with your left hand and then gently pop off the Gated Filigree Wrap with your right hand. Once you have removed the wrap, clean the board with your Cricut Spatula. This is also important as leaving even the tiniest scrap behind could mess up your next cut.
Also, if you see that a filigree edge or two got a messed up during the cutting process, DO NOT fret! The beauty with this design is that you can take a pair of scissors and clean up the cut if needed. There are sooo many beautiful swirls and florals in this design so even if you have to clip off a swirl or two, no one will notice.
STEP FIVE: Lay the Gated Filigree Wrap on a flat surface and lay the printed invitation facing up. Carefully fold the 2 gates around the invite. This can be a bit tricky with all the cut out edges. I gently folded and then used a bone folder tool to make the crease.
STEP SIX: Cut a 1.5 ” by 12″ strip out of the glitter paper to create the center wrap. I use the paper cutter to get make sure this strip is cut evenly. Connect the two ends in the back and use 3 glue dots to secure.


STEP SEVEN: Print out the monograms. I created the monograms as 1.75 inch squares. I printed them out using the same paper as I used for the invitation to make sure the whites were exactly the same. Next I cut out a 2 inch square from a glitter paper that was one shade darker than the center wrap. I attached the monogram to the 2 inch square and then I attached the square to the center wrap. I used 4-5 glue dots for the glitter paper to make sure it stayed in place. Place into an envelope and VOILA!

